해외상표출원서비스
(현 100여개 가능)
-
-

- 한국인이라 자랑스럽습니다.
-
현재의 한국 경제는 수 많은 기업과 선배님들의 노력으로 이룩한 결과물입니다.
우리나라는 전세계 242개국 중 159위(북한제외)의 면적 밖에 되지 않지만,
세계무역 8대 강대국으로 성장하였고, 한국문화(한류)는 아시아를 넘어 세계
젊은이들에게 널리 전파되어 한국 위상은 제품에서 문화로까지 한층 높아졌습니다.
(주)에프피컴은 선배님들의 인프라를 바탕으로 모든 서비스에 IT를 통한 철저한
시스템을 구축하고, "ccbrand.kr"에서는 다가오는 글로벌 지식 시장의 대비하여
중소기업인들에게 지식재산에 대한 이해와 서비스를 할 수 있는 기반을 마련
하겠습니다.
-
-
- ‘시시브랜드’는 중소기업의
- 해외 온라인 지적재산권 관리
직원이 되겠습니다. -
중소기업을 위해 해외 출원 비용절감 및 관리서비스, 국내.해외지식재산권 통합관리시스템을 통해
실시간 지식재산권 자산관리 등을 할 수 있는 혁식적인 서비스를 제공하겠습니다. 또한, 기업인의
의견과 고민을 반영하여 지속적인 개선과 개발을 통해 기업인이 원하는 솔루션으로
서비스하겠습니다. (주)에프피컴은 신뢰와 믿음, 정직함을 바탕으로 중소기업의 해외전문 컨설팅 파트너로
거듭나겠습니다. 많은 관심과 사랑 부탁드립니다. - 감사합니다. (주)에프피컴 대표이사
-

-
- 경영 마인드 및 방향성
-
기업의 꿈이 곧 임직원과 가족의 꿈이 될 수 있는 기업
- (주)에프피컴은 한국과 유럽의 기업문화의 장정만을 융합하여 새로운 기업문화를 추구하는 젋은 기업입니다.
-
 fp는 family park 의 줄임말로 사전적 의미로는 “어린이 대공원” 입니다. 어린시절 가장 즐겁게 향유할 수 있는 공간이며,
새로운 놀이문화를 접할 수 있는 “어린이 대공원”의 추억을 담아 임직원들의 즐거운 업무 공간을 제공하고, 창의적인 사고
및 시간의 효율적 안배, 자발적 업무의 책임감을 느낄 수 있도록하여, 기업과 자신의 꿈을 펼칠 수 있는 기업공간을
만들어가는 기업입니다. -
기업은 임직원과 가족을 최우선시하며
임직원들간의 소통, 배려와 협업을 생활화 하고
임직원의 가족 또한 기업을 사랑할 수 있는 기업을 꿈꿉니다. -
기업문화는 대표 혼자만이 아닌 임직원 모두의 변화가 필요합니다. 아직은 어린아이 걸음마 수준이지만 언젠가 어른이 되어 달리 수 있는 그날까지 초심을 잃지 않고
노력하겠습니다. -
나누는 기업
- 재화를 나누면 이윤은 줄지만 사람은 얻을 수 있습니다. 이게 바로 기업이 해야 할 일입니다.
-
IT기반을 바탕으로 내부 관리시스템과 고객대응시스템을 개발하여 관리비를 축소 및 인력을 최소화하고, 수익률을 높여 임직원에게 그리고 임직원 가족들에게 혜택이
돌아 갈수 있는 기업시스템을 만들어가기 위해 노력하고 있습니다. -
 직원과 함께 성장하는 기업
기업의 수익은 “사회로부터 그리고 직원으로부터” 라는 생각으로 직원들의 열정과 성과에 따라 여러 인센티브 혹은 혜택을 제공하여
자기개발과 기업과의 공동 비전을 추구(뚜렷한 목표와 명확한 성과 달성) 합니다. -
 사회의 공헌
기업목표가 수익창출이 아닌 "수익창출을 통해 각종 사회적 문제에 대한 해결과 어떻게 사회환원과 기부를 할 것인가!"를 먼저 고민
하는 기업을 목표로 하고 있으며, 윤봉길의사가 설립한 "월진회사단법인"의 청년 애국사업을 돕기 위한 활동 및 재능기부를 시작으로,
상표, 유통, 마케팅 등의 중소기업을 위한 교육재능 기부를 계획 및 진행하고 있습니다.
-
- 사업분야 및 비전
- 회사연혁
-
-
에프피컴퍼니 회사 설립 09월시시브랜드 해외상표 출원 서비스 출시
중국 네이밍 서비스 확대 11월 -
-

-
04월 (주)에프피컴 법인 설립05월 중국 위생허가 대행 서비스 및 상해 파트너사 업무 협약10월 중국상표 빅데이터 확보 및 관리시스템 구축11월 해외 변호사/변리사 파트너사 11개국 및 100여 국가
상표출원 가능 시스템 구축12월 특허청 산하 특허정보원 ‘우수상품과제 지원 선정’
특허청 상표 빅데이터 확보 및 관리시스템 구축 중
-
중국 대련에프피컴지식재산대리유한공사 설립(외자)
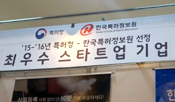
법인 증자 03월특허정보원 ‘2016년 최우수 스타트업 기업’ 선정
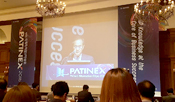
한국지식재산보호원 ‘중국 도용상표 조사 수행기업’ 선정 05월제6회 특허정보사용자 컨퍼런스(PIUC)참여 06월창업진흥원 ‘2016년 K 스타트업 기업’ 선정 07월본사 확장 이전(역삼동) 08월특허청 제12회 국제특허정보박람회(PATINEX 2016) 참여 09월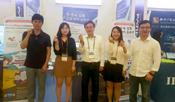
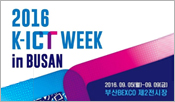
 부산 k ict week 박람회 참여
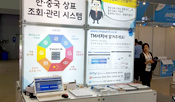
 PIAC 중국특허정보년회 2016 참여(PIAC 中国专利信息年会 2016)(PIAC Patent Information Annual Conference of China 2016)
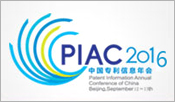
-

-
-
- 주요 Biz
-
-
지식재산권
해외 출원서비스
분야 -
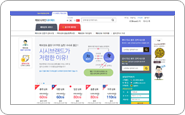
CCBrand.kr- 국내외 상표 검색 및 통합관리
서비스 제공- 해외 지식재산권 출원대행 서비스※ 중국, 일본, 홍콩 직진출
-
IP 솔루션 개발분야
-
지식재산권 통합관리 시스템 구축 개발- 특허사무소 관리시스템- 중소기업 독립 관리시스템
-
중국 네이밍
-
중국 진출을 위한 사전 네이밍- 중국 소비자에 각인 될 수 있는
현지화 네이밍
-
-
-
하반기
 년
년
-

-
IT기반으로한 솔루션 비즈니스 확장 및 해외 진출
-
-
-
중국 네이밍 서비스
중국 네이밍 서비스자세히 알아보기
- 중국인의 한자에 대한 자부심과 명확한 의미 전달
- 중국인에게 한자는 중국 최대의 자존심입니다. 한자는 표의문자(表意文字)이므로 짧고 명확한 의미전달이 가능합니다.
이로 인해 몇 글자의 한자로 상표와 회사명의 의미를 전달하기에 용이합니다.
이런 뜻과 의미가 있는 상표 및 상호는 현재 중국인들이 가장 선호하는 네이밍 중 하나입니다. 간혹 외래어 상표 및 상호의 발음을 중시하기 위해
발음대로(음역) 네이밍을 하는 업체가 있으며, 이때는 중국인이 싫어하는 단어 발음과 한자를 피하는 것이 가장 바람직합니다. - 네이밍의 4가지 방법
- 중국어 네이밍에는 4가지 방법이 있으며, 아래의 4가지 방법 중 2번 > 1번 > 3번 > 4번 순으로 작명을 하는 것이 바람직합니다.
또한 너무 길지 않게 한자로는 2~4글자가 적합합니다.
-
의역
발음은 다르나 의미가 명확한 네이밍음역
의미와 상관없이 발음이 비슷한 한자를 사용 -
음의겸역의
발음과 동시의 상표에 대한 의미를 내포한 네이밍-

- 이마트
-

-

(이마이더) -

- 베이직하우스
-
-

(바이찌아하오)
새로운 작명
발음, 의미를 새롭게 네이밍-

-
초코파이

 (하오리요우파이)
오리온은 회사의 "情"을 잘 표현하고, 오리온의 발음을
(하오리요우파이)
오리온은 회사의 "情"을 잘 표현하고, 오리온의 발음을
好丽友로 초코파이를 파이만 사용
오리온파이 = 초코파이로 인식을 할 수 있게 한
아주 좋은 사례
회사이름 = 오리온(음의겸역의) + 파이_초코파이(의역) = 새로운 이름 -
-
중국 네이밍 서비스
-
-
중국 위생허가 서비스
중국 위생허가 서비스자세히 알아보기
- 한/중 FTA 후 무역 활성화로 인한 합법적 유통 필요성 증가
현 중국 시장 내 한국 화장품이 가장 Hot한 영역임에도 불구하고, 비합법적으로 중국 수출을 진행하고 있는 상황
중국 내 해외구매대행으로 판매가 가능했던 화장품도 빈번한 수입 시 세관 통과의 어려움이 예상 됨
더욱이 중국 수입업체/온라인 업체 등 바이어 또한 위생허가가 있는 한국 화장품을 선호 함 - 위생허가 절차
- ※ 위생허가증 사용기간 : 4년( 연장을 원하시면 위생허가증 발급 후 3년 6개월이 지나지 않은 사용 만료 6개월전 미리 신청하셔야 합니다. )
- 고객
- 시시브랜드
- 검측소
-

-
성분표 검토중국 수출용
포장디자인
검토기업정보
중문 확인책임회사
위임장 작성
및 계약CFDA
계정신청중국 기관 :
성분검측 신청CFDA 심사요청
자료준비CFDA
심사신청CFDA 최종평가
및 위생허가서
발급
-
중국 위생허가 서비스
-
- 중국 대련 법인 설립한/중 FAT로 무역 활성화로 인한 합법적 유통 필요
- 중국 시장을 공략하기 위한
- 1번째 접근은 중국의 跨境电商(콰징띠엔상/해외구매플랫폼)을 활용하는 간접적 진출
2번째 현지 외자/합자 법인 설립을 통한 중국 진출 / 보세구역 면세점 활용 -
-
- 법인설립 신규법규
- 2013년 이후 외자에 대한 투자자본금 규제 완화
- 투자금에 대한 외환 송금 기간 완화(20년도 무관)
- 법인설립 투자금에 대한 세금 0%
- 외자 법인설립에 대한 절차 축소
-
- 법인설립 및 사무실 운영 관리 시스템
- 중국 대련개발구의 정부 건물내 입주
- 외자 법인설립 대행서비스(중국회사명/정관/서류준비 등)
- 비상주 사무실 제공
- 비상주로 인한 전화/우편 및 세무 등 원스톱 서비스
- 매출을 위한 마케팅 및 바이럴 대행 관리 서비스
- ※ 서비스 비용 : 법인 설립 - 150만원 부터
법인대행 관리 - 50만원 부터
-
-
-
-
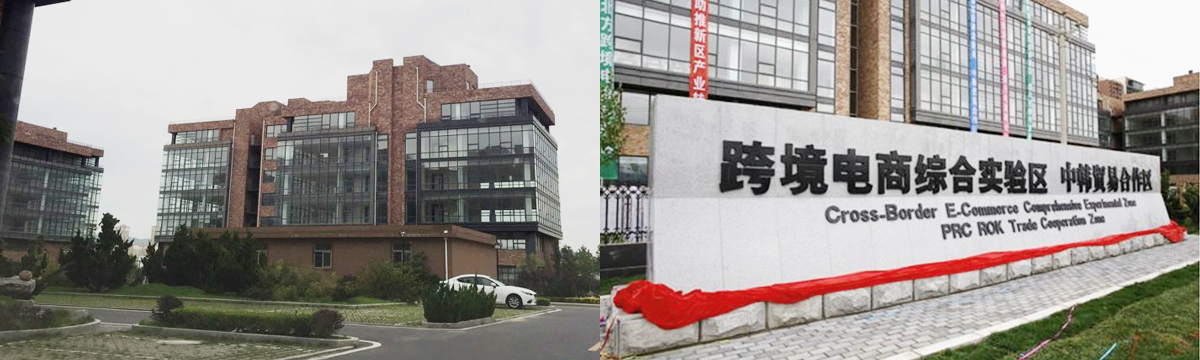
2016년 3월 대련아이프커지식재산유한공사 설립 완료대련개발구 공무원 행정지원 법인 설립
중국상표/저작권 등록 서비스
기타 업종 : 무역, 화장품도매, 컨설팅
-
-